It's getting better!
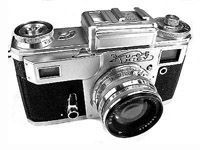
A portrait 135 mm monocle on "Kiev" rangefinder camera
- Kiev-4
Contents
Introduction
Being impressed by the article by Kolosov (in Russian), who created monocles
for rangefinders too, I constructed and tried my first monocle made from Jupiter-12. After that I decided
to go on this enthralling activity. I choosed long focal length optics to use it in portrait or still life shooting.
I post a request of purchasing bad Jupiter-11 or Jupiter-9
To be honest, I pitied to disassemble this specimen because its mechanics was in ideal state. Even better than of my own. But I found unreal thing: the focal lens of the front lens has such value that unlike the irreversible changes of Jupiter-12 construct no Jupiter-11 part was spoilt. I.e., if one need he will be able to assemble back usual Jupiter-11.
Moreover, the focal lens of the monocle is exactly 135 mm. So, there is no need to re-mark the distance scale, which brought a lot of headache in the prevouos case. One need only to adjust the lens at the infinity. This is good luck because in such case the camera rangefinder can be used for focusing. I think it is unnecessary to explain how it is important for the tele lens.
Fitting
Since I had not to clean and grease the mechanics of the lens I escaped its full disassembling. But if in your case you have to do it go to the very useful Kiev Survival Site and see how to put in order Jupiter-11. I will tell only about monocle creation process.
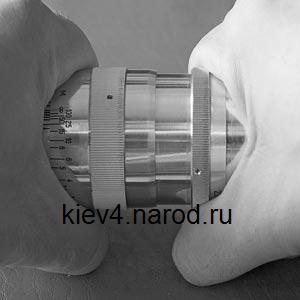 |
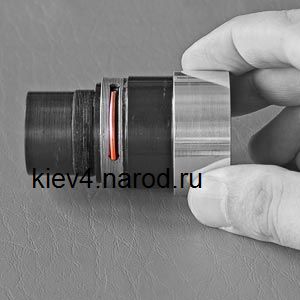
| Photo 1. Tube unscrewing. |
Holding the lens tube tight unscrew it by vigorous movement into two parts: the bayonet with the helical (1) and the lenses tube (2). If there are any shims between these parts do not throw them away — they will be able to be used in the future.
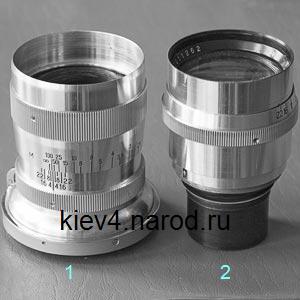 |
| Photo 2. The bayonet with the helical and the lenses tube. |
Put the part (1) aside and begin to disassemble the lenses block (2). At first unscrew fit ring of the front lens (3). Pull out the lens (4) and put it aside on a soft pad. This lens will be the basis of the monocle. Of course work accurately to break nothing.
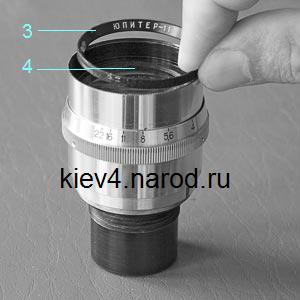 |
| Photo 3. Taking away the front fit ring. |
After that unscrew the inner fit ring (5) and very carefully extract great piece of glass (6).
 |
| Photo 4. Inner lens group removal. |
Turn the lenses tube upside down and unscrew the ring (8) which fixes the rear lens (7). We will not need all lenses except for the front one (4), and you can wrap them up into flannel and put in a safe place. Maybe they will be used for any other purpose or to restore the initial Jupiter-11. The rings (3), (5) и (8) now are useless also but to not get them lost I screw them back at their places. Solely I screwed the front ring (3) upside down to avoid light reflection within the monocle from the white paint which was used to write the lens serial number and name.
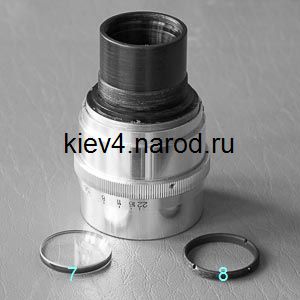 |
| Photo 5. The rear lens removal. |
It seems that now you can put the front lens (4) back into the tube (2) with concave side in front and the tube into the part (1),
but do not hurry up. The aperture selector ring can rotate reducing the aperture. This is wrong, in the monocle the diaphragm is
in the front
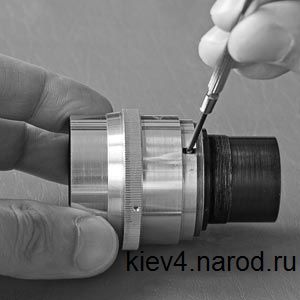 |
| Photo 6.Aperture seletor ring release. |
...and unscrew the ring (9).
 |
| Photo 7. The aperture selector ring off. |
As you can see on the photo 7, the aperture selector ring movement is limited
 |
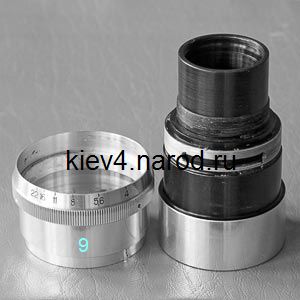
| Photo 8. The aperture selector ring fixing. |
Then, screw the ring (9) back and fix it with the screw as it was. This way we fix the built-in diaphragm in the f/4 position and keep the initial lens construct in perfect order. Screw the part (2) back into the part (1).
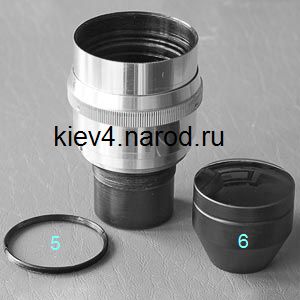
The incredible luck concerned with the lens construct is not only in the simplest way of aperture fixing but also in the fact that the front lens is in the 40.5 mm thread tube. You know that this monocle's focal length is 135 mm and this means that the lens tube need to be lengthen. The most simple option is to take several screw-in filters with 40.5 mm thread, take out the glasses from them, put the lens (4) in one of them and the outer diaphragm in the other one. I.e. you have not to invent any specific frames like for the monocle made from Jupiter-12. Filters mey be old cheap Soviet photo filters of new chip video. The lens (4), of course, should be placed in the filter frame with the concave side in front.
 |
| Photo 9. The monocle with the front lens. |
If the filter frames are not blacked, as it was with mine, you need to make insets
 |
| Photo 10. Light absorbing inset placing. |
How far sould be the diaphragm from the lens you can find by minimal coma. Notice, that it is required to minimize coma, otherwise the image in the corners will be much unsharper than in the center.
The diaphragm f/5,6 should be cut off from the black plastic also. In the circle with 40 mm diameter drill the aperture with 25 mm diameter. Fix this ring in the frame of the last filter. To avoid unscrewing of great construction that you made of multiple filter frames fix them and the tube together with a scotch tape. The monocle is ready let's go to adjust it.
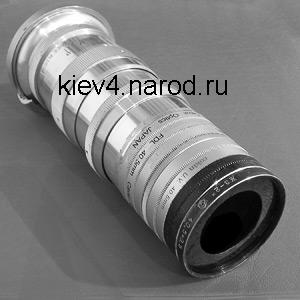 |
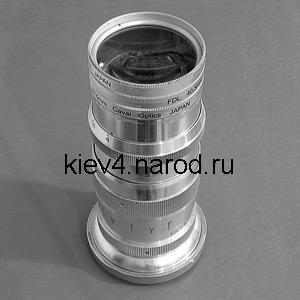
| Photo 11. The monocle as an assembly. |
Optical works
The adjusting of the portrait monocle is much easier then the wide-angle one. FIrst, due to narrow depth of field of the tele lens and longer helical movement it is easy to find at a glance rough range where focus at infinity is. It is better to set the lens a little bit closer in the tube than needed to be sure then you find on the scale the point of the best focusing and then you will add shims between parts (1) and (2) or set additional filter ring between the lens and the tube. Second, when I began to construct the monocle I had not known that the initial Jupiter-11 and the monocle made from it angles of view are the same, and you know it now from me. So, you do not need to find any other points on the scale except for the infinity mark.
On photos with size of 20x30 cm I cannot find any difference in shaprness between two shots which were made at distances with 1 mm difference on the scale. So, you may take a stripe of paper, write a ruler with 1-1.5 m points on it and stick it to the distance scale at the range where you are going to find the infinity point. Then, make a series of test shots using your temporary scale. Test objects should have low contrast, otherwise the halo around contrast transitions will prevent you to choose the sharpest shot.
Then, after you found the sharpest image, measure by a slide gauge the length which you need to move the lens forward by, find the appropriate material for shim between parts (1) and (2). As before, I recommend not to use cardboard as a material for making shims. It not only produces dust but it also reacts to air humidity change, inflating of drying up. This spoils all efforts you make to adjust the lens.
Testing
It is time to test the lens. The first example (photo 12) shows that the focal length
 |
| Photo 12 |
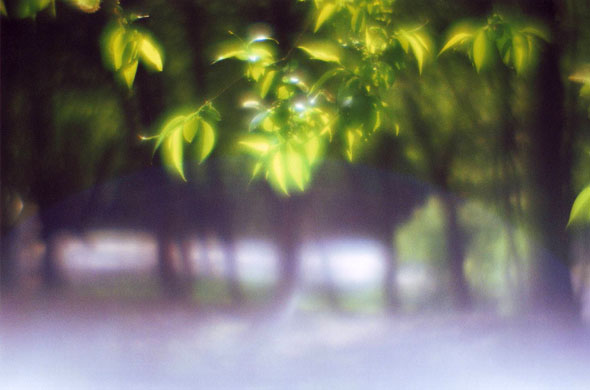
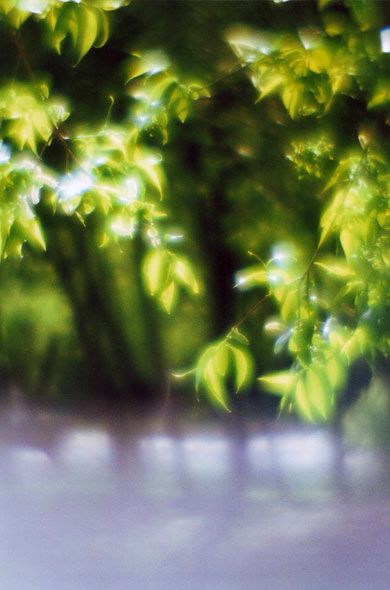
Then, I need to repeat what I said about the wide-angle monocle. First, no way without a hood. This lens loves to catch flares. The examples are on the photo 13a and the photo 13b. Violet round spots occupy significant areas. Second, it seems that you need to make exposure compensation +1 EV. They are these photos that look better. The monocle dislikes under-exposure.
 |
 |
| Photo 13a | Photo 13b |
But there are differences. This lens has noticeable curvature of field. So, to get the minimal coma you need to place the diaphragm far away from the glass. There is a trade-off between the pictire quality and the filter frames quantity. Moreover, the farther is the diaphragm from the lens, the more is vignetting. The example is the photo 14. The diaphagm was at 30, 60 and 90 mm from the Jupiter-11 front edge (from top to down photo). Look at the halo that surrounds the tap of the central bottle and size and shape of flares on the other two.
 |
| Photo 14 |
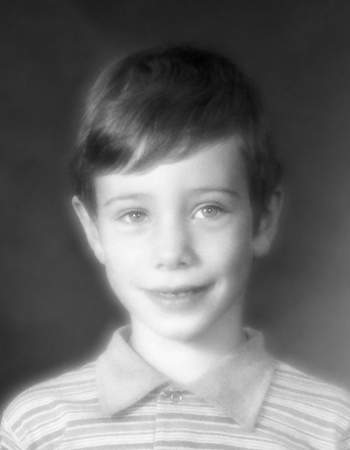
What as for me I like the last variant of these three. Even more, vignetting does not do badly for portraits which are the main purpose for this monocle. So, I set the diaphragm at the long distance and took a series of photos, one of which you can see below:
 |
| Photo 15 |
Take into account that unlike the photo 12 the photo 15 has no distinctive halo around the figure, the picture is more sharp and the vignetting is significant. All that is the result of the distance increasing between the glass and the diaphragm.
What to read about "Kiev-4" camera