It's getting better!
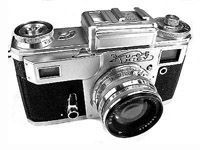
A wide-angle monocle on "Kiev" rangefinder camera
- Kiev-4
Contents
Introduction
I heard about monocles rather long ago. But as far as I use the rangefinder camera I thought that even if I could create it I will not be able to use it. However, the article (in Russian) of wide-known russian photographer Georgy Kolosov who constructed monocles for rangefinder cameras as well, encourage me to try myself in this area.
Let's think that you know basics of monocle construction. If not there are a lot of them in the Internet. The only thing I need to explain is what are the problems with a monocle on a rangefinder camera and how to overcome them. If you use a monocle on SLR camera you do not need the distance scale — you can estimate sharpness very well through the viewfinder. With the rangefinder camera you cannot do that. To create monocle made from one of Jupiter lenses coupled with rangefinder is the very hard task because it hardly will have the same focal distance as the initial lens. I have no ability to rebuild lens helical or to find coated lens with the required focal length. So, I had the only way: to re-mark the distance scale by numerous test shots and then use the rangefinder camera as a scale focus one.
Scale focus cameras are provided with wide-angle lenses due to well known reason: they are not so sensitive to focusing accuracy errors. I had a defective Jupiter-12 which was nominated to the experiment sacrifice. Its front lens appeared to be an ideal for this purpose because its focal length is about 45 mm (scale focus Smena-8M has a 43 mm lens). How did I find that? I took the front lens (there is no need to extract it from its metal frame ring with the serial number engraved), a ruler and a matte glass. In one hand I hold the lens at the ruler end and by another moved the glass but-and-ben looking at the projection of a building placed far enough to count it at infinity. When the building became quite sharp I found the rough focal length of the monocle.
At the very beginning I want to call you upon to not dissect good examples of Jupiters, their quantity is becaming less! There are a lot of bad ones which you will buy for a song. Chiefly, the front lens must be clean and unbroken and the focusing ring must rotate easily. And nothing else. However, my example had a chip on the front lens edge.
Fitting
On the useful Kiev Survival Site you can find Jupiter-12 dismantle scheme. We need first 13 pictures (up to the grease tube). The others, dedicated to second lens group and helical dismantle, we do not need now. So, the lens came to the required state. To create monocle we will use four parts shown on the photo 1 from this pile of wreckage: the bush with aperture mechanism (1), the aperture selector ring (2), the lens tube with the helical (3) and the front lens in the frame (4).
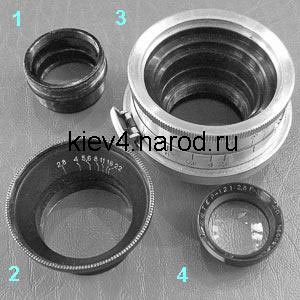 |
| Photo 1. Parts needed to create monocle. |
Than vandalism begins. The diaphragm should be removed from the bush with aperture mechanism (part 1). Without a trace. In monocle diaphragm resides in front of the lens. So, remove not only the ring which presses the blades to a partition but also the partition itself. A file, a drill, a lathe — choose what you want. After partitition removing screw together this bush and the aperture selector ring (2), as shown on the photo 2. The part (2) from now is not responsible for aperture selection and became another one lens tube part, so, the screw that engaged the aperture selector ring (2) with the aperture mechanism itself (1) and thin spacer shim (if any) you do not need anymore. Parts (1) and (2) should become the one part — screw them up to stop. Maybe, the holes for the screw of these two parts will match, this results in light leakage through the hole. Close it up.
 |
| Photo 2. The bush and the aperture selector ring. |
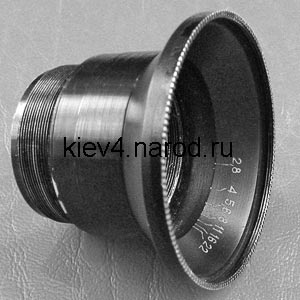
Screw the item you made into the lens tube (3) in the place it was before. Then this almost ready monocle (photo 3) can be mounted on the camera. If now we attach the lens (4) turning it over to the front edge of the part (1) the distance from the film surface to the lens will be more than the lens focal length. Measure by slide gauge how much should you grind off the bush (1) front side to get 45-47 mm from the film to the lens top. It is better to grind off a bit more than needed and after the adjusting described below add shims.
 |
| Photo 3. The monocle's tube as an assembly. |
Dismantle all parts again and grind off the bush. Grind it off from behind, as well, by 2-3 mm, otherwise, there will be noticeable vignetting in the corners of the picture, I know it for sure. You see, we move the front lens farther from the film, so, the rear edge of the bush became the obstacle for the light. During grinding off do not care of inner threads — they will not be needed. Otherwise, take care of outer threads, they will be required for assembly.
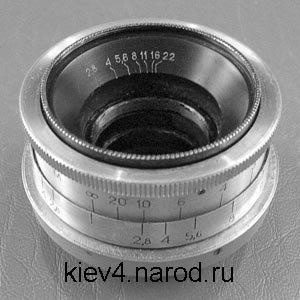
After all unnecessary was grinded or sawed off black all shining surfaces in the bush (1) with black paint or if nothing else by black permanent marker. Screw the aperture selector ring (2) onto the bush. Screw the assemblage into the tube (3). Attach the lens (4) to the bush with the concave side outside. Its frame diameter is 3-4 mm less than outer diameter of the bush. To fix the lens and to aviod light leakage through the gap in the conjunction point and, on the other hand, not to fix forever (you will need to add adjusting shims) it is better to cut a thin strip of polyurethane from mouse pad and to press it between the lens (4) and the aperture selector ring (2) — see Photo 4.
 |
| Photo 4. Fixing the lens in the tube. |
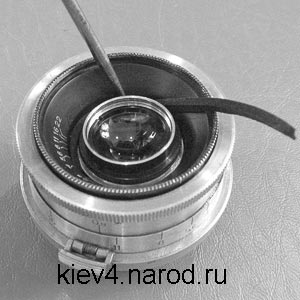
The result is shown on Photo 5.
 |
| Photo 5. The monocle as an assembly (the diaphragm is not attached). |
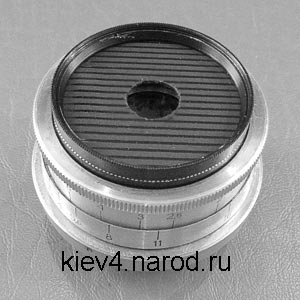
Then make a diaphragm of black plastic (I do not recommend to use cardboard for this purpose because it produces dust which makes the lens dusty).
The round hole of ten millimeters in the diaphragm corresponds to the aperture value f/4.5. If the aperture diameter is too small (f/8 amd more)
the monocle effect disappears and the monocle becomes like a lens of a cheap focus-free poind-and-shoot camera. So, the optimal aperture value is
 |
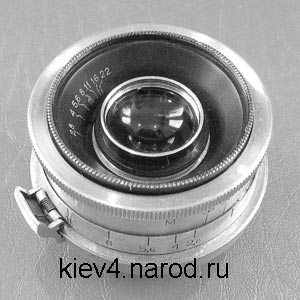
| Photo 6. The monocle as an assembly. |
Optical works
Now we need to adjust the lens. This can be done two ways: using the matte glass and
After that I chose the most sharp test image from these six. If this photo was made at one of middle marks of the distance scale - you had a luck - you found from the first the range on the distance scale for more detailed study. If the best shot was made at the infinity mark this meansthat you grind off the bush (1) front side not enough. You will have to disassemble the monocle and to work on the bush again, and then to repeat the shooting of the test photos series. If the best shot was made at the mark 0.9 m this means that you tried too hard during sewing-up. This is not terrible. When you set the distance at this mark the lens moves forward by 1.6 mm in comparison the infinity mark. Add a shim of the material with appropriate thickness. After that repeat the test shooting.
I strongly recommend not to use cardboard as a material for making shims. It not only produces dust but it also reacts to air humidity change, inflating of drying up. This spoils all efforts you make to adjust the lens.
Using the same method I found points on the scale for 5 m and 3 m marks: I put two targets in the room and shot a series of test photos.
So, 12-exp. color film is sufficient
Testing
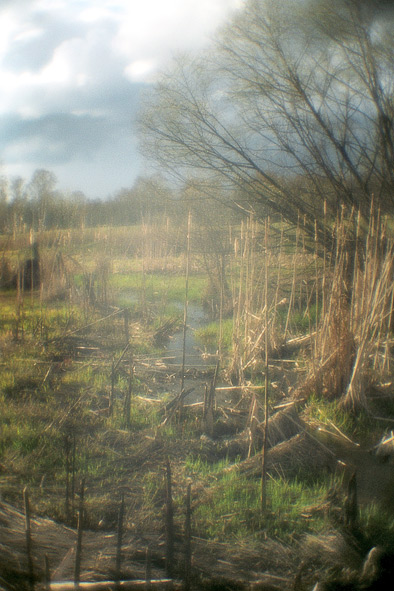
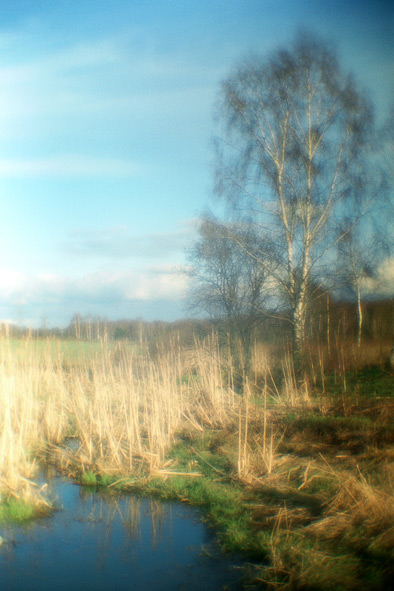
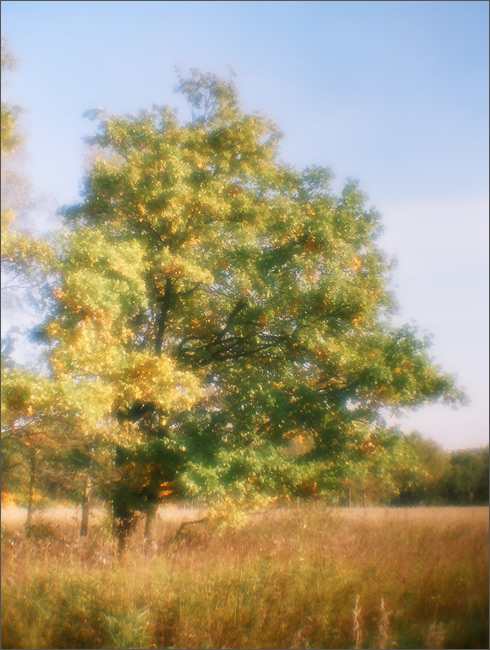
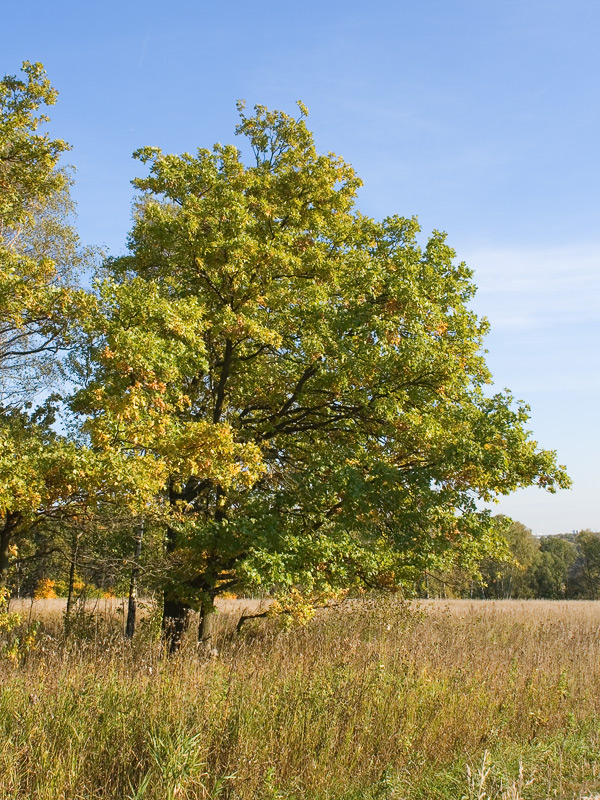
After you marked the scale it is time to test the lens shooting character. I need to say that I have not got enough experience in using the monocle. But I can say something. First, no way without a hood. This lens loves to catch flares. Second, it seems that you need to make exposure compensation +1 EV. At least, it were these shots which were better than photos I took using the shutter speed recommended by the exposure meter. Anyway, it is always good habit to shoot with exposure bracketing. And third, the monocle makes the contrast and the color saturation higher. Maybe, due to absence of light reflection inside the lens. And this makes the shooting more difficult: large dark objects turn into dark blots on the picture. This requires to be more careful when you choose the scene.
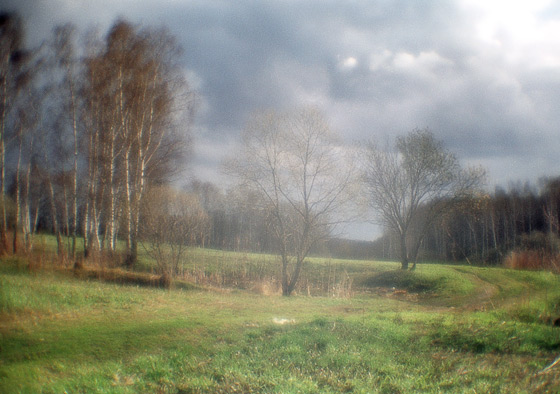
Surely, it is silly to tell about the lens and not to show examples of pictires. Below you can find three photos took by the monocle and by the conventional lenses. These are "first attempt at writing" and if I will take more interesting pictures I will show them. I do not know why but the printed photo of 20x30 cm and the negative scan have different effect. There is something in the paper photo which disappears from the digital image. Nevertheless, you can see that it is not an ordinary blur or soft filter effect on the scanned images. There are monocle's photos in the left column and conventional lenses' photos in the right one.
 |
 |
 |
 |
 |
 |
Improvement
Keen reader must have take notice that there is a light spot on each example of monocle's shots shown above. If this reader have took pictures by Jupiter-12 lens made by LZOS (Lytkarino plant for the optical glass) he know that this ware loves to catch flares.
By the way, the initial lens was put on the rack because it loved flares. Notice: two example scenes of three above were lit by front-side
light (nevertheless the hood was
If you see at the front glass frame rear side (Photo 5), you will find that its inner surface is not blacked
ABSOLUTELY. The aperture in the monocle is round and placed in front
After I blacked this part of the lens frame the monocle bacame absolutely indifferent to flares except for those, of course, whish are created by the Sun shining boldly and directly to the lens. I think, this treatment will be useful for those Jupiter-12 which are not intended to be made over. The front lens come out elementary. Above all, do not forget to mark its position inside the tube to put it back as it is.
The result pleased me:
 |
 |
Monocle's viewfinder
If you have a question how to do viewfinding using the RF camera with the monocle which have unusual focal length I have the answer. You should set the
universal viewfinder focal distance to the
The viewfinder window has rounded corners. The radius of this rounding is about 1/12
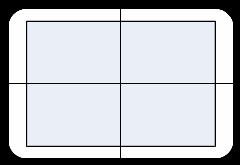 |
| Fig. 11. The monocle viewfield in the 35 mm viefinder. |
What to read about "Kiev-4" camera